
Creating a Home Recording Studio:
Your Guide to Crafting a Creative Haven
12/5/20244 min read
3. Acoustic Treatment: Enhancing Sound Quality
Acoustic treatment is key to achieving professional sound. Here’s how to get started:
Bass Traps: Place in corners to absorb low-frequency sound.
Acoustic Panels: Mount on walls to reduce reflections and echoes.
Diffusers: Scatter sound waves for a more balanced room tone.
Budget Tip: Use foam mattress toppers or thick blankets as DIY sound absorbers.
4. Organizing Your Studio Space
A clutter-free workspace can boost creativity and productivity. Here are some tips:
Use a desk with cable management features to avoid tangled wires.
Arrange your gear ergonomically, with frequently used equipment within reach.
Add personal touches like LED lighting or inspiring artwork to make the space your own.
5. Building Your Workflow
Once your gear is set up, develop a workflow that supports your creative process:
Recording: Experiment with mic placements and gain settings.
Editing: Use your DAW’s features to clean up recordings and arrange your tracks.
Mixing: Balance levels, apply EQ, and add effects to create a polished sound.
Mastering: Finalize your track for distribution with software or online services.
6. Budget-Friendly Tips for Beginners
Start small and upgrade as your skills and needs grow.
Look for used gear in good condition to save money.
Use free or trial versions of DAWs and plugins before committing to a purchase.
Pro Tip: Invest in versatile equipment that can handle multiple tasks, like a good condenser microphone for both vocals and instruments.
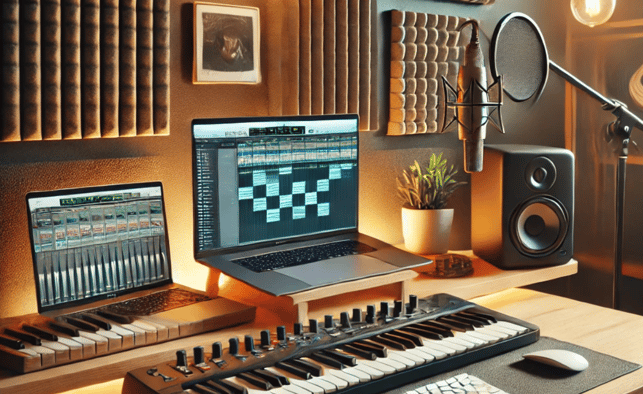
The Inspiration Factor: Designing an Inspiring Studio
A home studio isn’t just about functionality—it should inspire creativity. Consider these ideas:
Lighting: Use adjustable LED lights to set the mood for different sessions.
Greenery: Add plants to create a calming atmosphere.
Mood Board: Display images or quotes that inspire your music.
Conclusion: Your Studio, Your Sound
Creating a home recording studio is an investment in your creativity and growth as a music producer. Whether you’re recording demos, producing beats, or mixing tracks, having a space tailored to your needs will allow you to focus on what matters most: making music.
Stay Tuned for More Tips and Tricks!
Want to take your music production journey to the next level? Sign up for our newsletter to receive expert tips, gear reviews, and tutorials delivered straight to your inbox. Join a community of creators building their sound from the ground up—subscribe today!
Sign up below and get your FREE Ebook " From Pen to DAW: Mastering Music Composition in the Digital Age"
With the rise of digital audio technology, setting up a home recording studio has never been more accessible. Whether you’re an aspiring producer, a budding musician, or a seasoned songwriter, having a dedicated space to capture your creativity can elevate your craft. But where do you start? What equipment is essential, and how do you create a space that inspires creativity?
This guide will walk you through the key components, budget-friendly tips, and essential gear recommendations to help you set up a home recording studio that meets your needs.
Why Build a Home Recording Studio?
A home studio gives you the flexibility to record, mix, and produce music whenever inspiration strikes. Here are some of the main benefits:
Creative Freedom: Work on your projects without the time constraints of a rented studio.
Cost Savings: Reduce expenses on hourly studio rates by investing in your own setup.
Personalized Space: Design a studio that reflects your workflow and creative style.
Convenience: Record and experiment at your own pace, whether you're a night owl or an early bird.
1. Finding the Right Space
Choosing the right room for your studio is crucial to achieving the best sound quality. Here’s what to consider:
Size: A medium-sized room works well. Avoid overly small rooms that amplify sound reflections or large spaces that are hard to treat acoustically.
Noise Levels: Select a room that’s quiet and away from external noise like traffic or household disturbances.
Shape: Avoid rooms with square dimensions to minimize standing waves (unwanted sound reflections).
Pro Tip: Use thick curtains, rugs, and bookshelves to absorb and diffuse sound naturally, reducing echoes without breaking the bank.
2. Essential Equipment for Your Home Studio
To start recording, you’ll need a few key pieces of gear. Here’s a breakdown of the essentials:
a. Computer
Your computer is the heart of your studio. Choose one with enough processing power to handle digital audio files and plugins.
Recommended Specs:
Minimum 8GB RAM (16GB or more for larger projects).
SSD storage for faster file handling.
Multi-core processor (Intel i5/i7 or AMD equivalent).
Examples:
MacBook Pro: Ideal for creatives, with excellent performance for audio software.
PC Desktop: A more customizable and budget-friendly option.
b. Digital Audio Workstation (DAW)
A DAW is the software you’ll use to record, edit, and mix your music.
Popular Options:
Logic Pro X (Mac only): User-friendly and feature-packed.
Ableton Live: Great for electronic producers and live performances.
FL Studio: Perfect for beatmakers and beginners.
Pro Tools: Industry standard for professional recording.
c. Audio Interface
The audio interface connects your instruments and microphones to your computer, converting analog signals into digital audio.
Features to Look For:
At least two inputs for flexibility (e.g., vocals and guitar).
High-resolution audio (24-bit/96kHz or higher).
Recommended Models:
Focusrite Scarlett 2i2: Affordable and reliable for beginners.
Universal Audio Apollo Twin: Premium option with excellent sound quality.
d. Microphones
Your choice of microphone will depend on what you’re recording.
Dynamic Microphones:
Great for vocals and live instruments.
Example: Shure SM58.
Condenser Microphones:
Best for capturing detailed vocals and acoustic instruments.
Example: Audio-Technica AT2020.
e. Studio Monitors and Headphones
Good playback is essential for accurate mixing.
Studio Monitors: Designed for flat, accurate sound.
Example: KRK Rokit 5.
Studio Headphones: Closed-back for recording; open-back for mixing.
Example: Audio-Technica ATH-M50x.
f. MIDI Controller
If you’re composing or producing, a MIDI controller makes it easier to play and program virtual instruments.
Popular Options:
Akai MPK Mini: Compact and versatile.
Novation Launchkey: Seamlessly integrates with Ableton Live.